Bunk Room Build
- Oct 5, 2021
- 5 min read

Now that the main framing is done, it's time to work on the right side and to make this baby pretty! If you missed my framing post you can find it here.
I designed the right side so there would be a 'secret room' below (which can eventually be used as storage space!), a fort area on top and then stairs to climb up.

There are many different ways to make stairs, but I had an incredible amount of scrap 2x4s left over from the build so I went with this way! I saw a photo on Google and then just came up with the dimensions according to my space.


I made sure to secure everything to studs in the side wall and the sides of the secret space.

I went over measurement again and again because I didn't want the steps to be too steep, but also didn't want the stairs coming out too far. Somehow I ended up getting it just right.

I decided to add bead-board to the side wall up along the stairs....and in true 'when you give a mouse a cookie' form, I ended up going all along up the walls and into the fort area!

I used 1"x10" pine for the risers because it was cheaper than buying individual risers. My stairs are not quite half the width of standard stairs material sizing, so I was wasting a lot of material buying a standard size and cutting each down to not quite halfway. Since these are bunkbed stairs they don't have to be to code, however if you're building normal stairs you have to have the treads + risers a certain size to ensure safety. Don't do what I do if you're building real-sized human stairs. :)


For the treads, I bought oak bullnose treads and cut them down to make them look like a chunky, waterfall edge. This could've been a complete fail but I was SO happy with the way these turned out and it saved me almost twice the amount of money it would've cost for me to buy the look I wanted.

I chamfered the edges, used Bondo and sanded them really well so they're nice and smooth for the boys.


This corner step gave me hell and I was SUPER close to giving up- but I didn't. And shockingly you wouldn't even know it once looked like this!

Ta-da!

Best biggie coming over to check on progress!

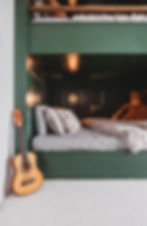
I wrapped the entire interior base of each bed with 1x8 primed pine and added 1x6 primed pine to add detail to the 'headboard' and 'footboard' area of each bed.

I also added decorative trim inside the 1x6s that matches the desk built ins I did earlier this year.


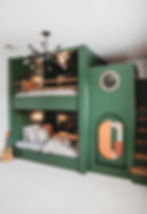
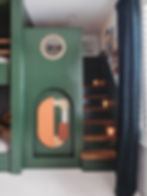
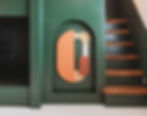
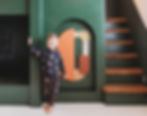
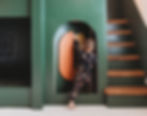
I built a door for the secret space underneath the stairs and had planned to cover the entire front with 1/2" plywood. Once it was in I liked the idea of adding an arch for the opening, so I drew a quick sketch only my phone to visualize better and decided to go for it!

I also wanted to add a porthole window to the top for the boys to look through so I made one with cardboard to decide on the size. When I searched online for a porthole window, I couldn't find a good quality one for less than 1k that would fit my space. I asked Phil to have his welders make me two steel pieces for the front and the back, then custom ordered a tempered piece of glass the size I wanted for $100. MUCH cheaper!

I sprayed the metal pieces a matter black and then used rub n' buff in 'European gold'.

I stained the steps 'Antique Walnut' by General Finishes.


For the railing, I had Houston Hardwoods make me two 1 3/4" poplar boards. You can purchase 1.5" pine boards at your local hardware store but having a lumber mill make them allows you to make sure they're not warped. Also, choosing a 'harder' wood will help make sure they don't warp over time. I chose poplar and am very happy with it, but you can also choose a walnut or oak for a bit more $!

I tested out the height by adding blocking in between the boards. Our mattresses are 10" tall and I wanted to make sure there wasn't too much room in between for the boys head to go through.


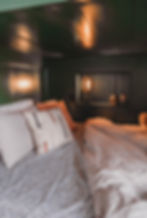
I hired an electrician to add the sconces that I purchased because I wanted to make sure they were done correctly and safely. Last time I checked they were sold out of these specific lights, but this is the shop I bought them from and was very pleased with how fast they arrived considering they came from Greece!


I wrapped the framed in 1"x primed pine. To make it EXTRA miserable for myself, I mitered the edges of the boards that wrapped the posts. I knew it would bother me to see butt joints after working my butt off for so long on this project so I went for it. I'm so happy I did! It makes it look much more professional.

I cut them into two different pieces to make sure it fit in snug- I did a bevel cut at the most inconspicuous place I thought I could, and after wood-filling as sanding you can't even tell!

I added shiplap to the ceiling of both the upper & lower bunks and 1/2" MDF to the sides.


COST BREAKDOWN
Framing lumber: $406.38
Railing: $75.83
Shiplap: $143.36
Stair materials: $157.05
Finishing Materials (Primed boards + Trim): $692.57
Bead board: $132.76
Porthole: $104.72
Paint, Primer + Stain: $221.89
Sconces: $283.49
Electrician: $550
Total Cost: 2,768.05


FAQ:
How big is the room?
12’ x 14’. The back wall is 12’ wide by 9’ tall.
How long did it take to build?
It took 2.5 months total. We discovered mold behind the walls and had to have the complete exterior of these two walls replaced so that took a big chunk of the time. I think that mold is the whole reason I was meant to build these- it would’ve been years or until we sold the home to have found it otherwise!
How much did it cost to build?
$2,768.04 for the build including cost of electrician and the sconces. The breakdown is listed a little bit up the page!
What sizes are the beds?
I built this for queen beds which are 60” x 80”. I added 1.5” to those dimensions on all sides and then wrapped the interior walls with 1x8s so with the mattresses in there is almost an inch of space around the mattress on all sides.
What color is it?
The bed is Vogue by Sherwin Williams in semi-gloss. I sprayed it with my Graco TC Pro sprayer. The stain I used on the railing and stairs is Antique Walnut by General Finishes.
LINKS
Duvet Cover (Queen)
Duvet Insert (King)
Mattresses (Code: HANDMAKESHOME gets $250 off Original Mattress)
Sconces (Out of Stock last time I looked but this is the store. Definitely recommend them!)
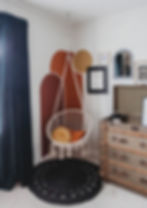
Dresser (Restoration Hardware from 7 years ago, no longer available on their website)
Curtain Rod
Drapes
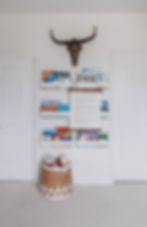
Brass Steer Head (I bought mine from Home Goods for $80, this one is very similar!)
Railings (1 3/4" poplar custom made from Houston Hardwoods. If you're not local- Google search your local lumber mill)