Home Office Makeover: Built-In Bookshelves DIY!
- Sep 26, 2019
- 5 min read
Updated: Feb 21, 2021

It's been over 3 years since we moved into our home and I can remember when we were building, our home office wasn't a priority when it came to upgrades. For the price our builder asked, I just felt like it was something we could wait on and do later and spend much less money doing so. Fast forward 3 years, we FINALLY made it a priority- and I'm SO HAPPY we did! It's funny how horrible you realize a space looks once you invest the time (& money) into making it how you want it. The office is the very first room you see when you enter our home so now our guests have a much better first impression!
This really was an easy build and although it took me a few weeks, if I didn't have the boys to entertain or a photography business to prioritize, it could've easily been done in a week! Purchasing the lower cabinets pre-made from Lowes cut out MANY hours and I would definitely recommend! Here we go. :)
Tools Used
Tape Measure, Straight Edge, Pencil
Eye and Ear protection
Supplies Used
Upper Kitchen Cabinets (upper cabinets aren't as deep!)
1.5" thick poplar for the countertop (I had mine made by Houston Hardwoods)
Plywood (I used 3/4"'blondewood')
2"x6" wood for base
1x4 poplar (used as trim)
1x2 poplar (used as trim)
Lattice Molding
Paint (I used Sherwin Williams 'Tricorn Black')
Wood filler
Caulk
2.5" self tapping wood screws
2" wood screws
Decor
Finished Size: 12'wide
Approximate Total Cost: $900 (this includes light fixtures)
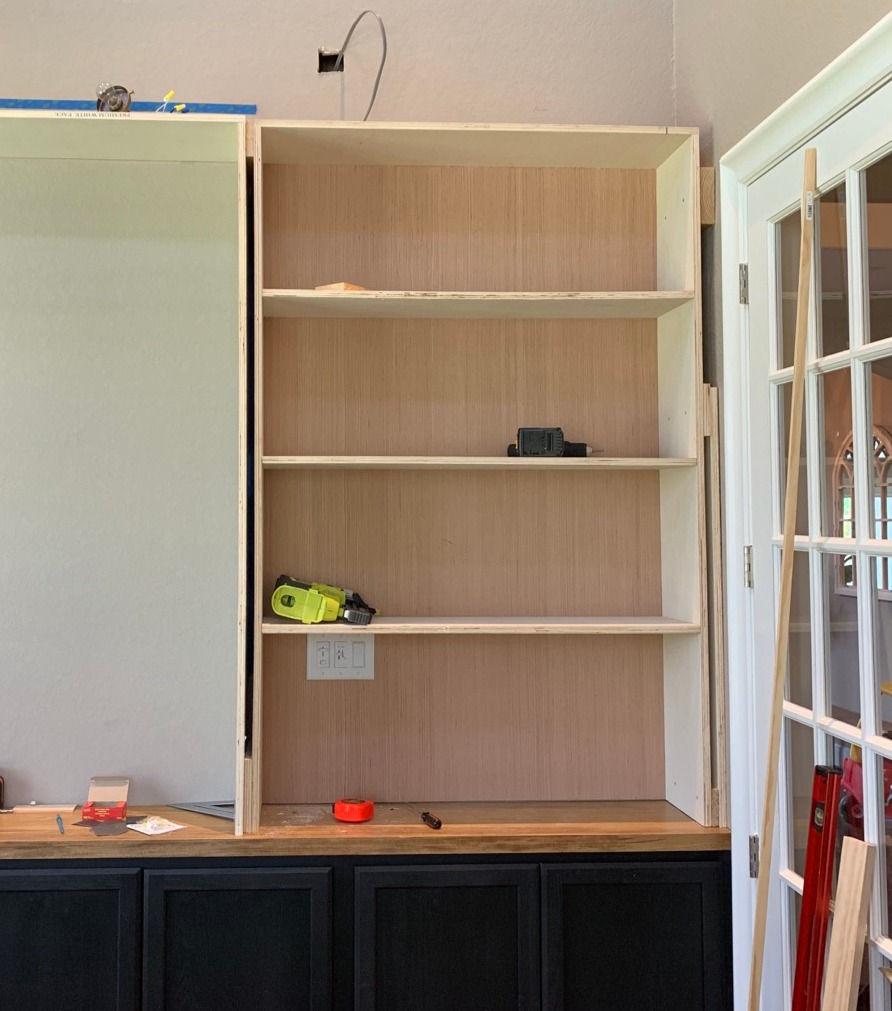
MEASURE/COME UP WITH A DESIGN
The first thing I did was measure my wall and draw up a design. I liked the idea of having an open space in the middle for art (ideally you'd know what you want to hang there and measure accordingly- I did not so I just guessed) and then two bookshelves on either side. Because there wasn't much room from where the door to enter the room is and the back wall, it made more sense to use upper cabinets which aren't as deep as the upper cabinets. I saw this done by Sarah at Thrifty Decor Chick and thought it was perfect for our space!
INSTALL BASE CABINETS
I carefully removed the baseboards+3/4 trim so I could re-use them and, because my baseboards are 6" tall, I decided to make my base with 2x6s.

I attached the base to the studs in the wall with 2.5" screws. I decided to use these upper cabinets from Lowes (they come in different sizes, I chose the 36" wide x 30" tall) and needed 4 of them.

I then placed all the cabinets onto the base to make sure they fit. Our sheet rock wasn't straight so we had to cut into it 1/4" on one side to shove the cabinet front in. If you have outlets, measure and cut out holes now to install the outlet inside the cabinet. Next I used clamps to make sure all the cabinet fronts were flush before I drilled them together. Our back wall (as in most cases) is not perfectly even so your priority should be to make all the cabinets flush on the front before securing it to the base/wall.

If there are gaps in certain spaces behind the cabinet, insert a shim where needed before attaching it to the wall.
Next I drilled the cabinets directly into the base with cabinet screws as well as into the studs in the back and side walls.

Next you'll stain your counter top, unless you want to paint it which you'll wait to do at the end. I had my countertop made at a local shop called Houston Hardwoods, but if you're not near the Houston area you can google your nearest mill and they should be able to easily make you one in your exact dimensions! I chose to have mine made out of poplar and it's 1.5" thick.
Before attaching the butcher block counter to the top, I strategically added scrap wood to fill in the gap between the cabinet and the counter so I could drill from underneath into the counter.

Next I measured for my bookshelves. I wanted to add 3/4" shims in between each unit and between the outer units and the wall so I accounted for that. This way I could use wider trim to make the bookshelves appear to be made out of thicker wood than they were. Once I built each frame, I placed it on the unit to measure and make sure they were the correct size. My middle unit is 1" deeper than the outer 2 units because with such a long wall, I wanted to add an element of depth. I'm SO happy with the result, however looking back it was definitely way more time consuming and a bigger headache than if I just would've made the entire thing flush. If you don't think adding that extra inch makes much of a difference aesthetically, I would suggest not doing it! (For reference, my counter is 13" deep, the middle unit is 11.75" deep and the outer units are 10.75" deep).

I then added the shelves and backing to the outer bookshelves and placed them back up on the cabinets. Make sure to measure for and cut a hole wherever your outlet is now. I added the shims and attached each unit to each other and the studs in the wall, as well as to the counter from underneath the cabinets, using a level to make sure everything was perfect.
Once all the units were secure, I added 1x2" poplar as the vertical trim (6 total) and 1x1" (9 total) horizontally with my cordless nail gun. For the inner unit, I knew I wanted to add trim to make it look more custom so I accounted for the thickness of that when installing the inner vertical trim.

This is what the inner trim looks like before adding the final piece to the front, which will sit flush to the right, leaving about an inch exposed of the left piece of trim.
Next I started installing the shiplap to the wall, starting at the top and going down. I cut down the bottom piece so it would fit. I then measured for and built the 3 boxes I added on top that the light fixtures will be installed to. These will be flush with the trim on the top of the bookshelf units, as well as flush with the wall and each other (as opposed to the units which I left 3/4" of space in between. I then screwed them into the studs in the wall, and down into the bookshelves.

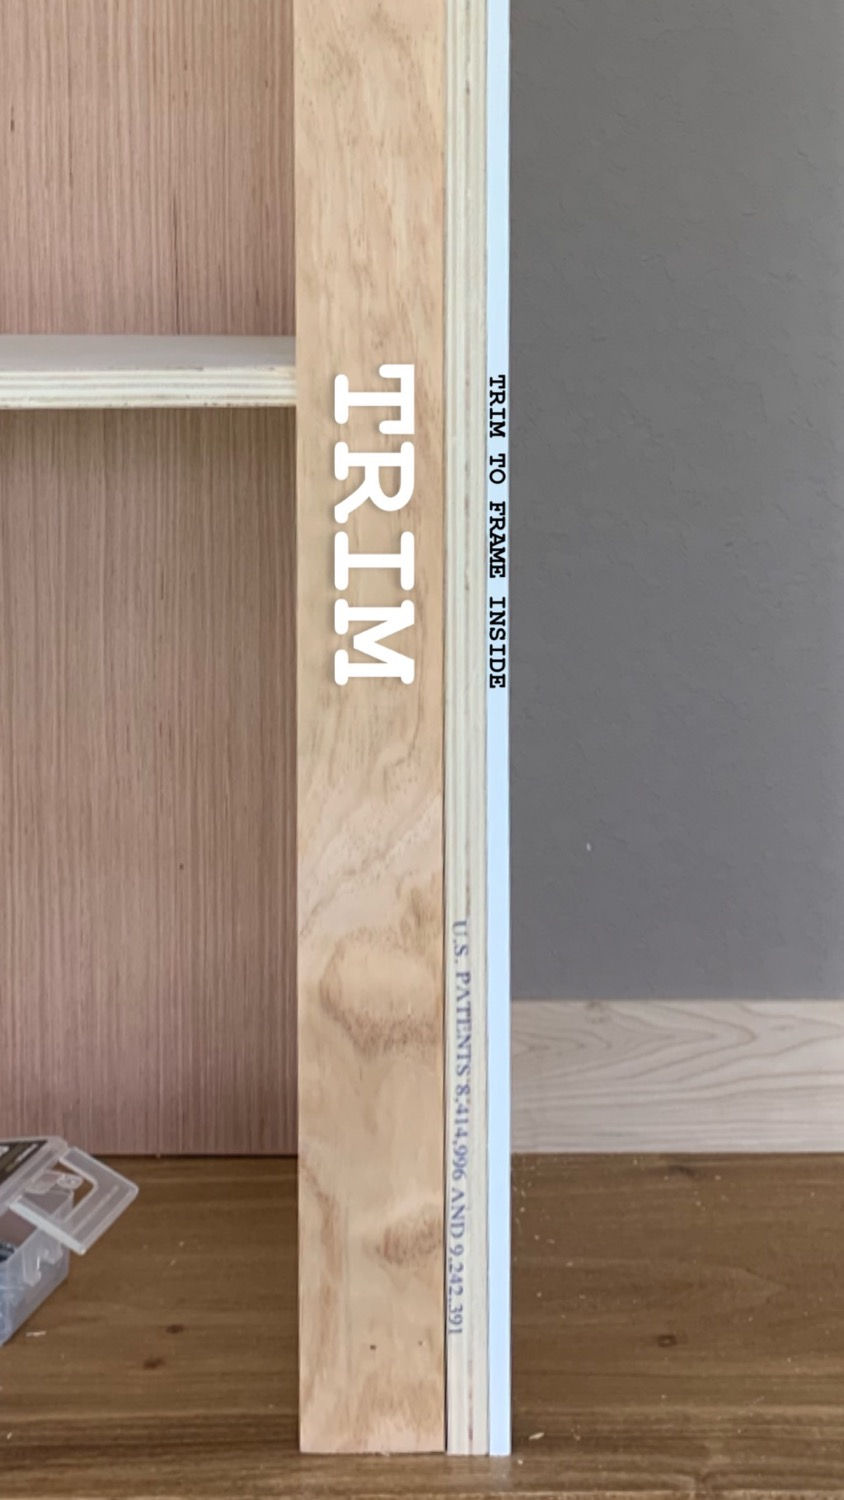
I wanted the inside of the inner unit to appear finished so I added this trim to frame it out.


Then I attached the crown molding as well as a small piece of molding along where the boxes meet the top of the bookshelves (all with my nail gun) so the seam will be hidden. Then I started caulking and used wood filler to fill in all the holes!

I also cut out holes where I wanted my light fixtures to be and had my husband do the wiring (I do NOT mess with electricity!). I also re-installed the same baseboards and 3/4" round which I painted black to match the cabinets.

And finally I taped off the entire room with plastic and used my sprayer to paint it! We installed the lights and she was ready to decorate!
Please let me know if you re-create this! DIY-ing makes me so happy and I love to share in the joy of all your projects and accomplishments! GOOD LUCK!


Mình có lần lướt đọc mấy trao đổi trên mạng شيخ روحاني thì thấy nhắc nên cũng tò mò mở ra xem thử cho biết. Mình không tìm hiểu sâu جلب الحبيب chỉ xem qua trong thời gian ngắn để quan sát bố cục جلب الحبيب cách sắp xếp شيخ روحاني các mục và trình bày nội شيخ روحاني dung tổng thể. Cảm giác là các phần được trình bày khá gọn, các Berlinintim mục rõ ràng nên đọc lướt cũng không bị rối جلب الحبيب với mình như شيخ روحاني vậy là đủ để nắm tin cơ bản rồi. جلب الحبيب
,
,
The home office makeover is very inspiring, especially how built-in bookshelves completely transform both storage and mood of the space. It reminded me of when my own study area felt distracting and cluttered during exams. During that time,I wanted academic assignment help UK which helped me to manage workload better so I could focus on reorganizing my space. A well-designed environment really makes studying feel more structured and less stressful.
Mình có lần lướt đọc mấy trao đổi trên mạng شيخ روحاني thì thấy nhắc nên cũng tò mò mở ra xem thử cho biết. Mình không tìm hiểu sâu rauhane chỉ xem qua trong thời gian ngắn để quan sát bố cục s3udy cách sắp xếp các mục và trình bày nội dung tổng thể. Cảm giác là các phần được trình bày khá gọn, các mục rõ ràng nên đọc lướt cũng không bị rối Berlinintim, với mình như vậy là đủ để nắm tin cơ bản rồi. q8yat
I think a home office makeover with built-in bookshelves is a great idea because it improves organization, saves space, and creates a more inspiring environment for work or study. In my opinion, DIY projects like this also add a personal touch and make the workspace more enjoyable. It also reminds me how students sometimes feel overwhelmed and think write my Java assignment, but breaking tasks into smaller parts and staying organized usually helps make work more manageable and less stressful.
Well written article. I came across https://grantonmanorhaunt.com/warnings-disclaimers/
and it covers similar topics.